I have come out of my craft show prep hibernation to share with you something else I finally finished! This last month has been crazy busy and I really haven’t left my little painting cove that I’ve created in my dining room. It’s a HOT. MESS. But I’m loving all of the creating and brainstorming I’m getting to do and I love seeing these signs come to life from start to finish. SO FUN!
I love DIY projects. All crafting, repurposing, and decorating projects make me so happy. Really every single thing I see on Pinterest or TV or anywhere really, I’m thinking, “How did they make that and how can I make it myself but for cheaper?” It’s like a sickness. Josh makes fun of me all the time for it. But I LOVE IT SO MUCH. I can’t even deal. I get excited just thinking about what my next project could be. I have a problem and admitting it is the first step. HA! It’s a good thing we only have a small townhouse with limited space for crap because I also don’t like clutter, so right now I’m on hold for new projects for our own house…. until I get desperate and just sell what we do have and then I can start over. Which I’ve done like twice in the last 3 years. I think that’s why I love to paint all of these signs for the craft show and for people’s orders. I get to make a ton of cute stuff and get it all out of my system but then it doesn’t stay here and take up space. Josh loves that part haha. It’s a win- win.
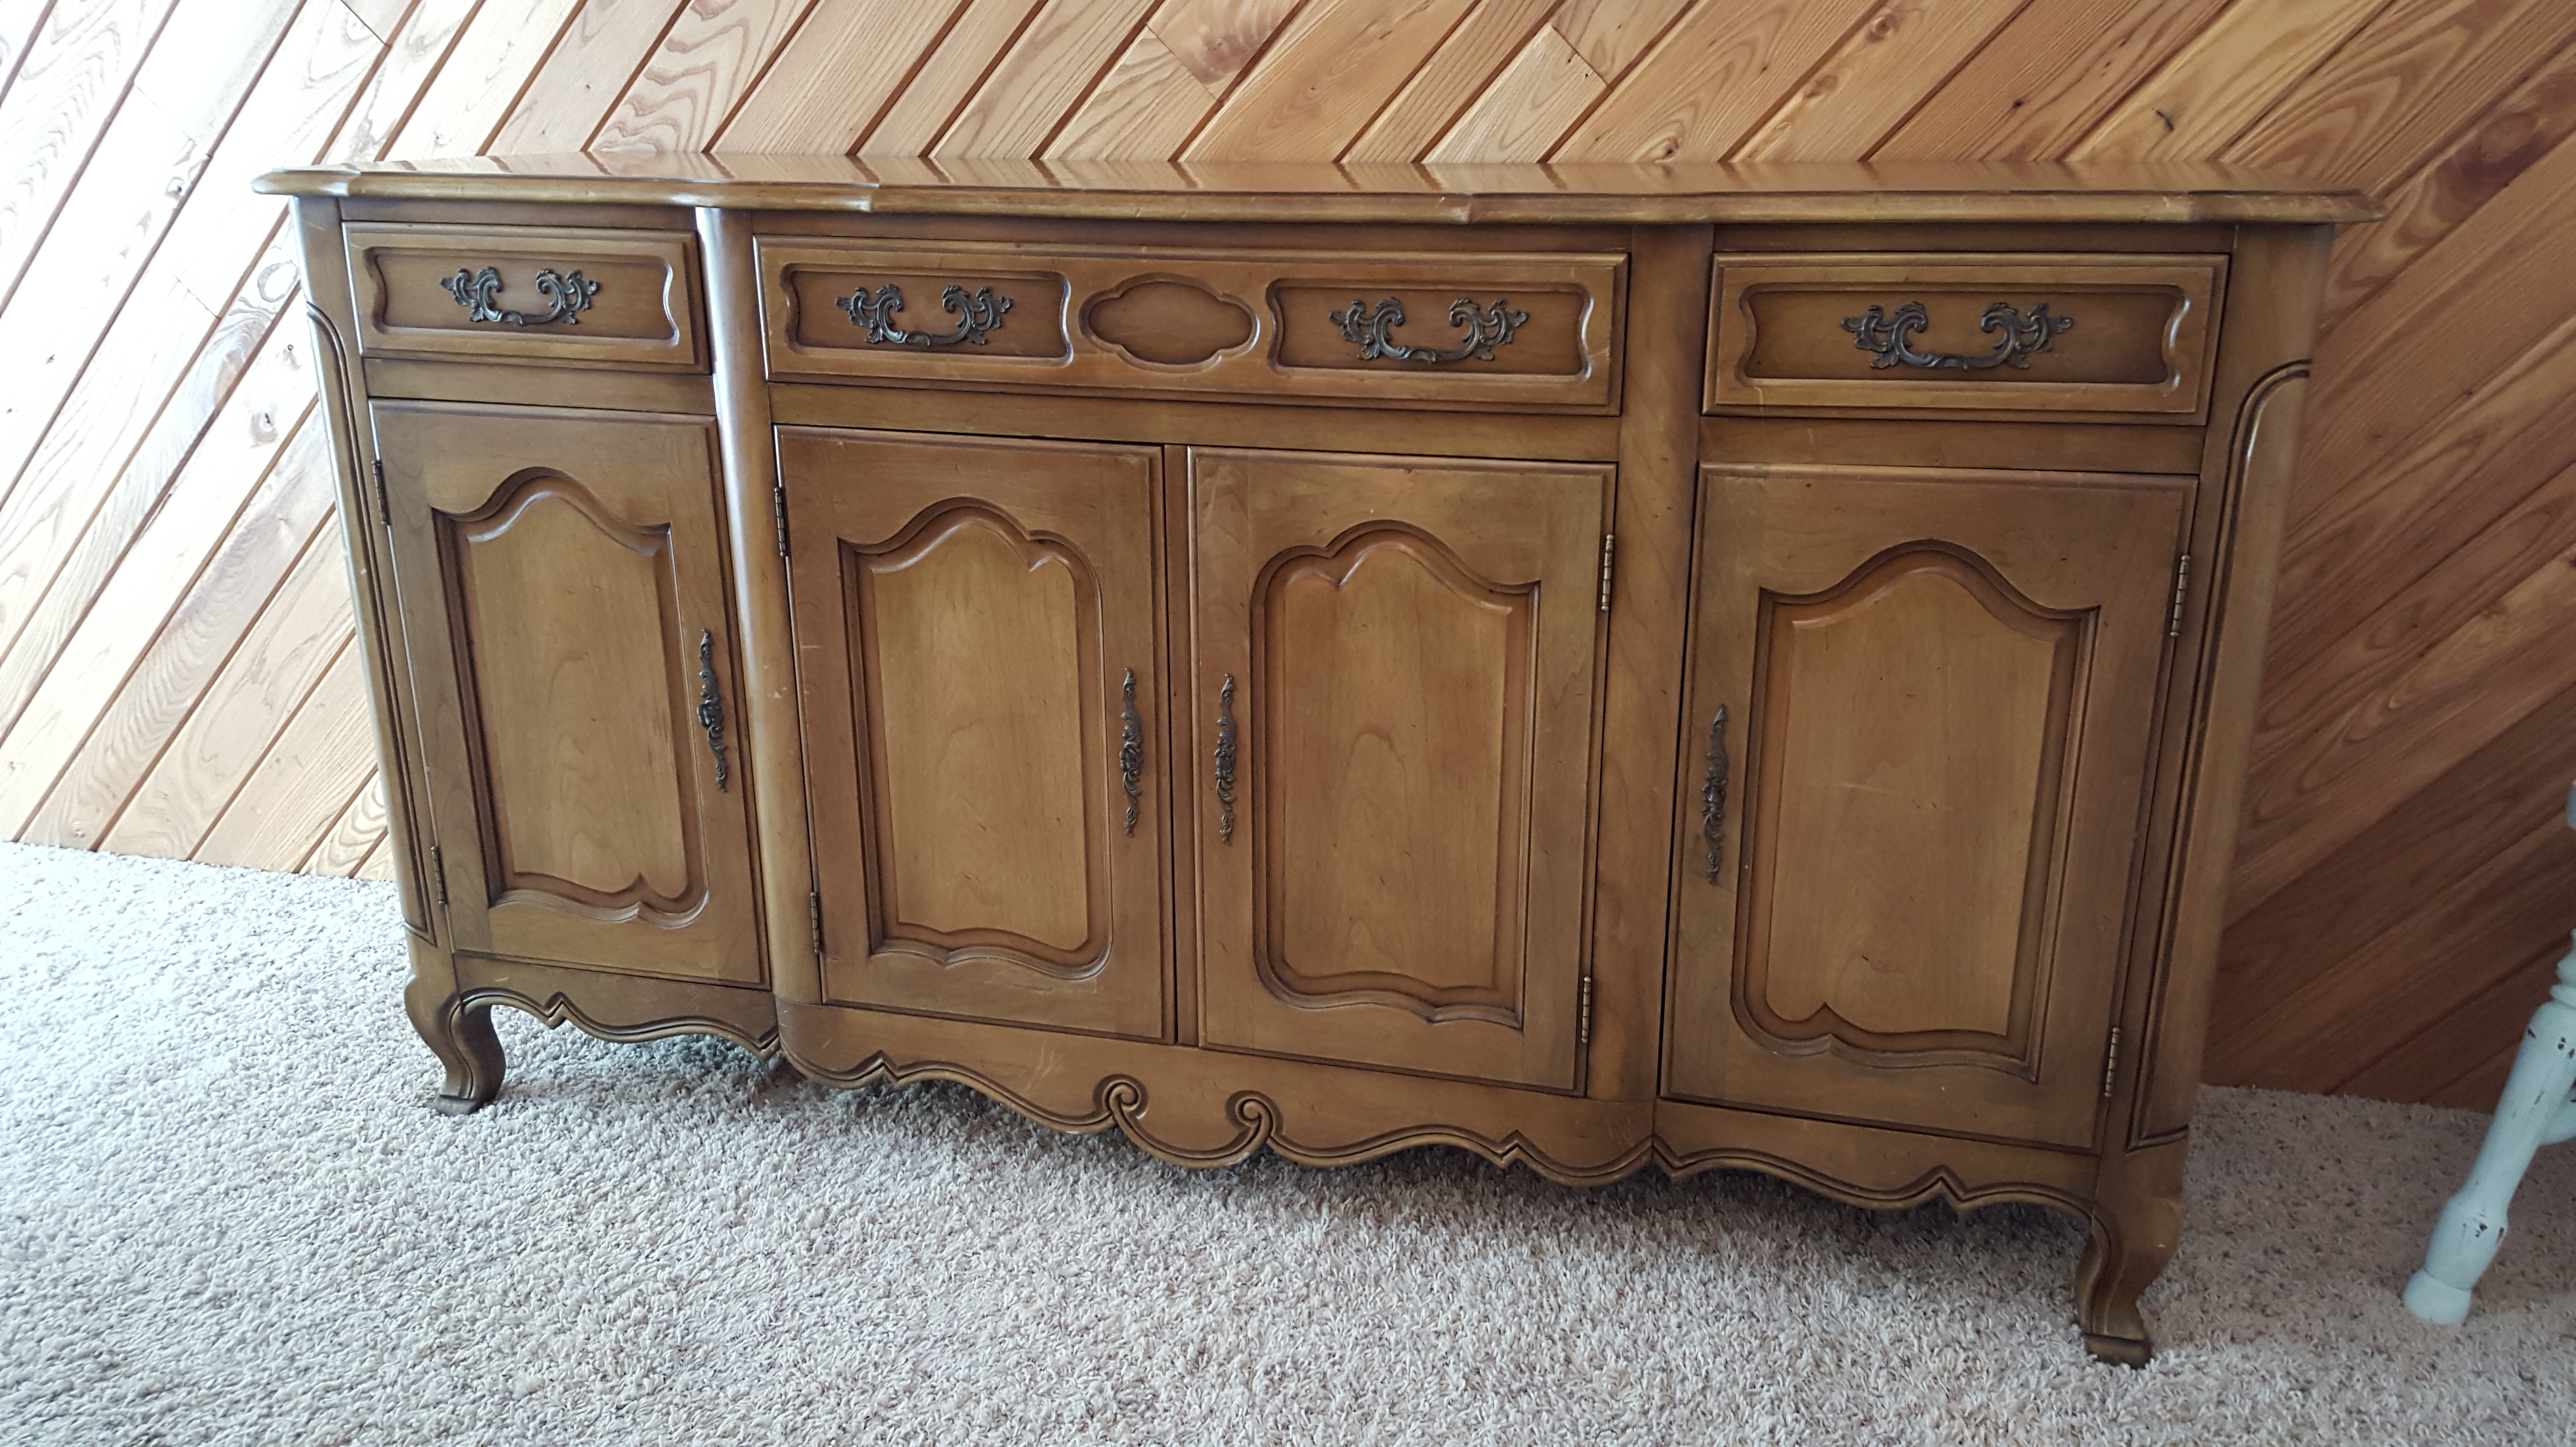
So anyways back to the reason for this post- to share my newest DIY furniture refurbishing project. This will be my last one for awhile because we have no more wall space. Sad face. I have been on the look out for a buffet with a hutch or just a buffet for awhile now. I was hoping for one that had great storage and was rather large and sturdy. I have this one wood wall- ugh- that needs a good piece of furniture against it to help it not be so intense. Listen, I’m all for a nice reclaimed wood wall or even some shiplap or low tone wood BUT our wall is like orange oak that runs diagonal on this huge wall in our dining room. Our landlord loves it. I however do not. We aren’t supposed to hang anything on it so that keeps me from having another gallery wall (which I’m also obsessed with). So I was looking for a buffet and I couldn’t find anything in our budget. Which was pretty much zero, but I was willing to make an exception for the perfect piece. Everything on Craigslist and at yard sales were in the $300-$500 price range. Not happening. I was even considering building one using plans from http://www.ana-white.com, my most favorite website of all time. Go there and explore. AMAZING. But I don’t have the space to build or all the tools I need right now. SOOO moral of the story… one day this summer I was scrolling through the Morgantown Yard Sale Facebook site and there it was, the perfect buffet, for $100. I immediately messaged the woman and went to look at it that day. We only have small cars, but she wanted rid of it so badly, her and husband even brought it to our house for us. This thing is solid. It doesn’t have a hutch but that’s ok!! It had all the shabby chic accents and potential I needed. She said it had been in her family for a long time and when I mentioned that I was going to refurbish it and that I didn’t care about the dings and small scratches, she was so excited to see it have new life! Josh, on the other hand took a little talking in to. He knows my habits of bringing home crap furniture to make it new again and ONE time – ONE TIME PEOPLE- I brought home this reallllllllyyyyy crappy desk from the REuse Habitat for Humanity store and it was beyond repair, broken all over, and it went to the garbage a few months later. That’s the thing that I’ve learned with refurbishing though. It can be REALLY ugly. But it can’t be broken. Paint and sand paper can’t fix broken. His thing is, as long as it can survive our move after residency, I can have it. If it’s going to break when someone picks it up, then NO. So back to my buffet. This thing is solid wood, HEAVY, and has tons of storage. It’s got drawers and shelves, and drawers inside of shelves, and doors to hide it all. Glorious. I’ll also mention that previously we had a storage shelf here that was from Target and it had the square openings for baskets, etc. It worked well for awhile until Rowan decided that he needed to take everything off of the shelves every day. Hence the need for the doors. The Target shelf and baskets made their way to our bedroom for extra storage up there! Here is a picture of it before, when it was first dropped off!

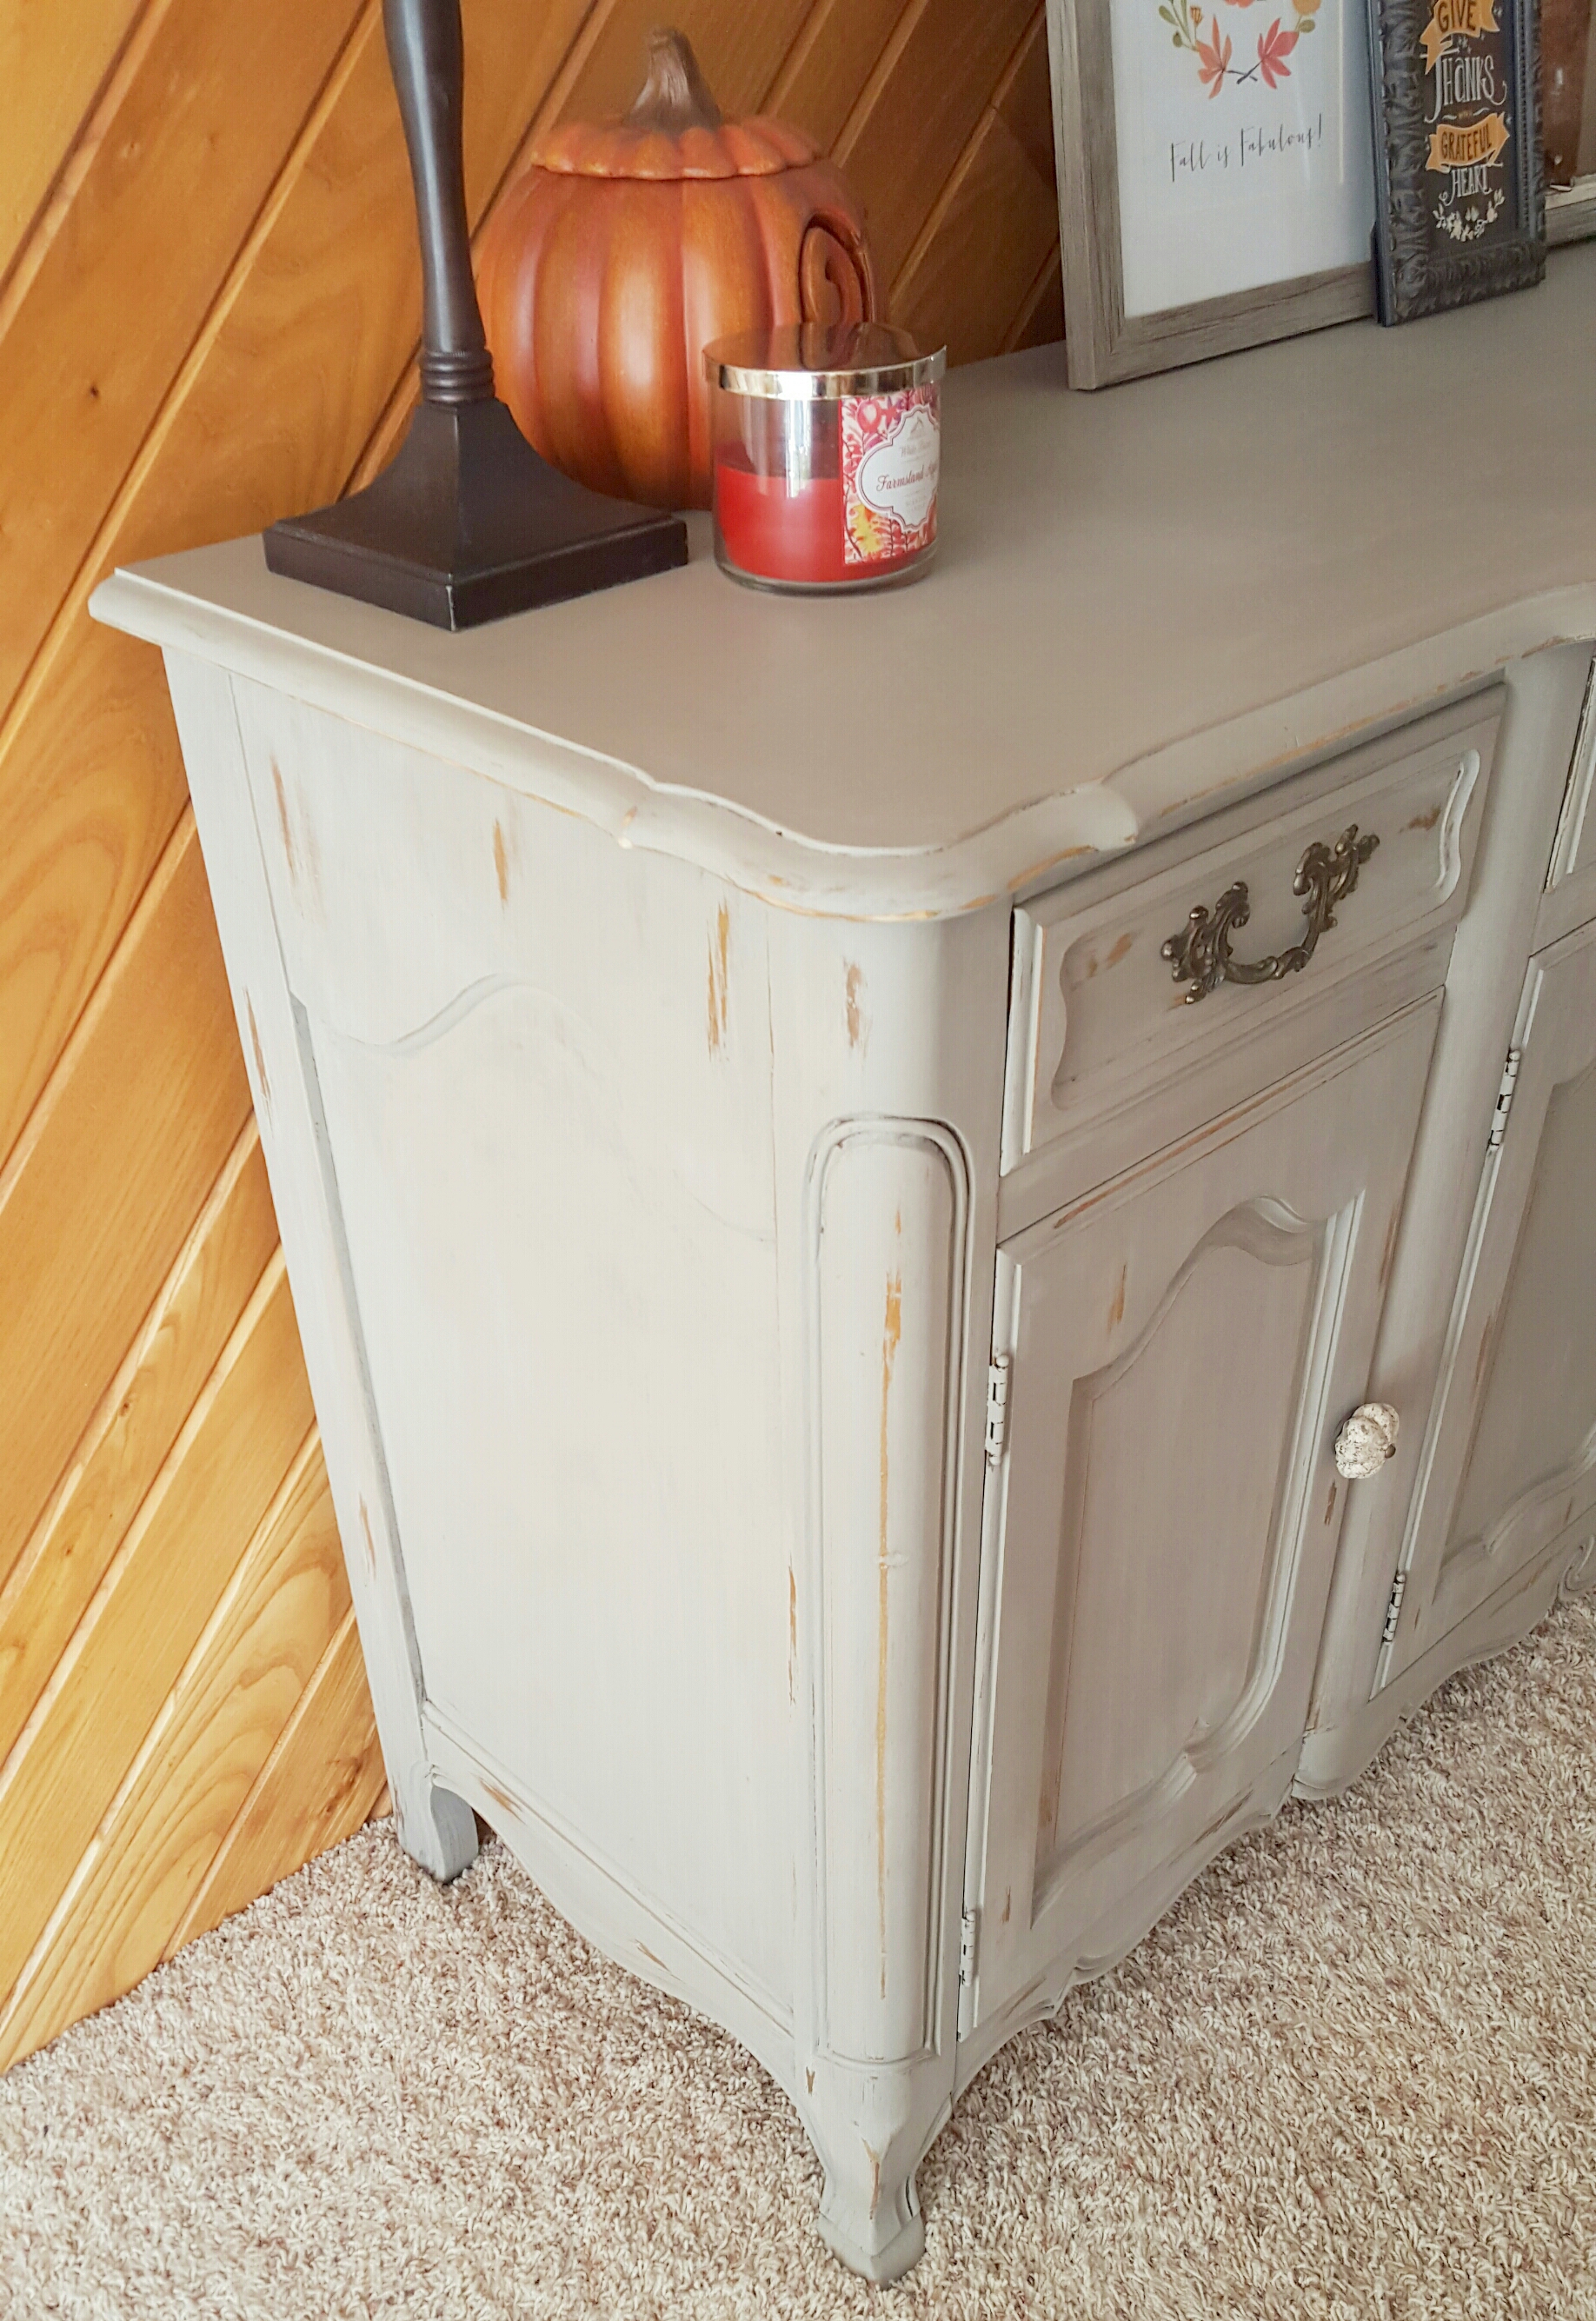
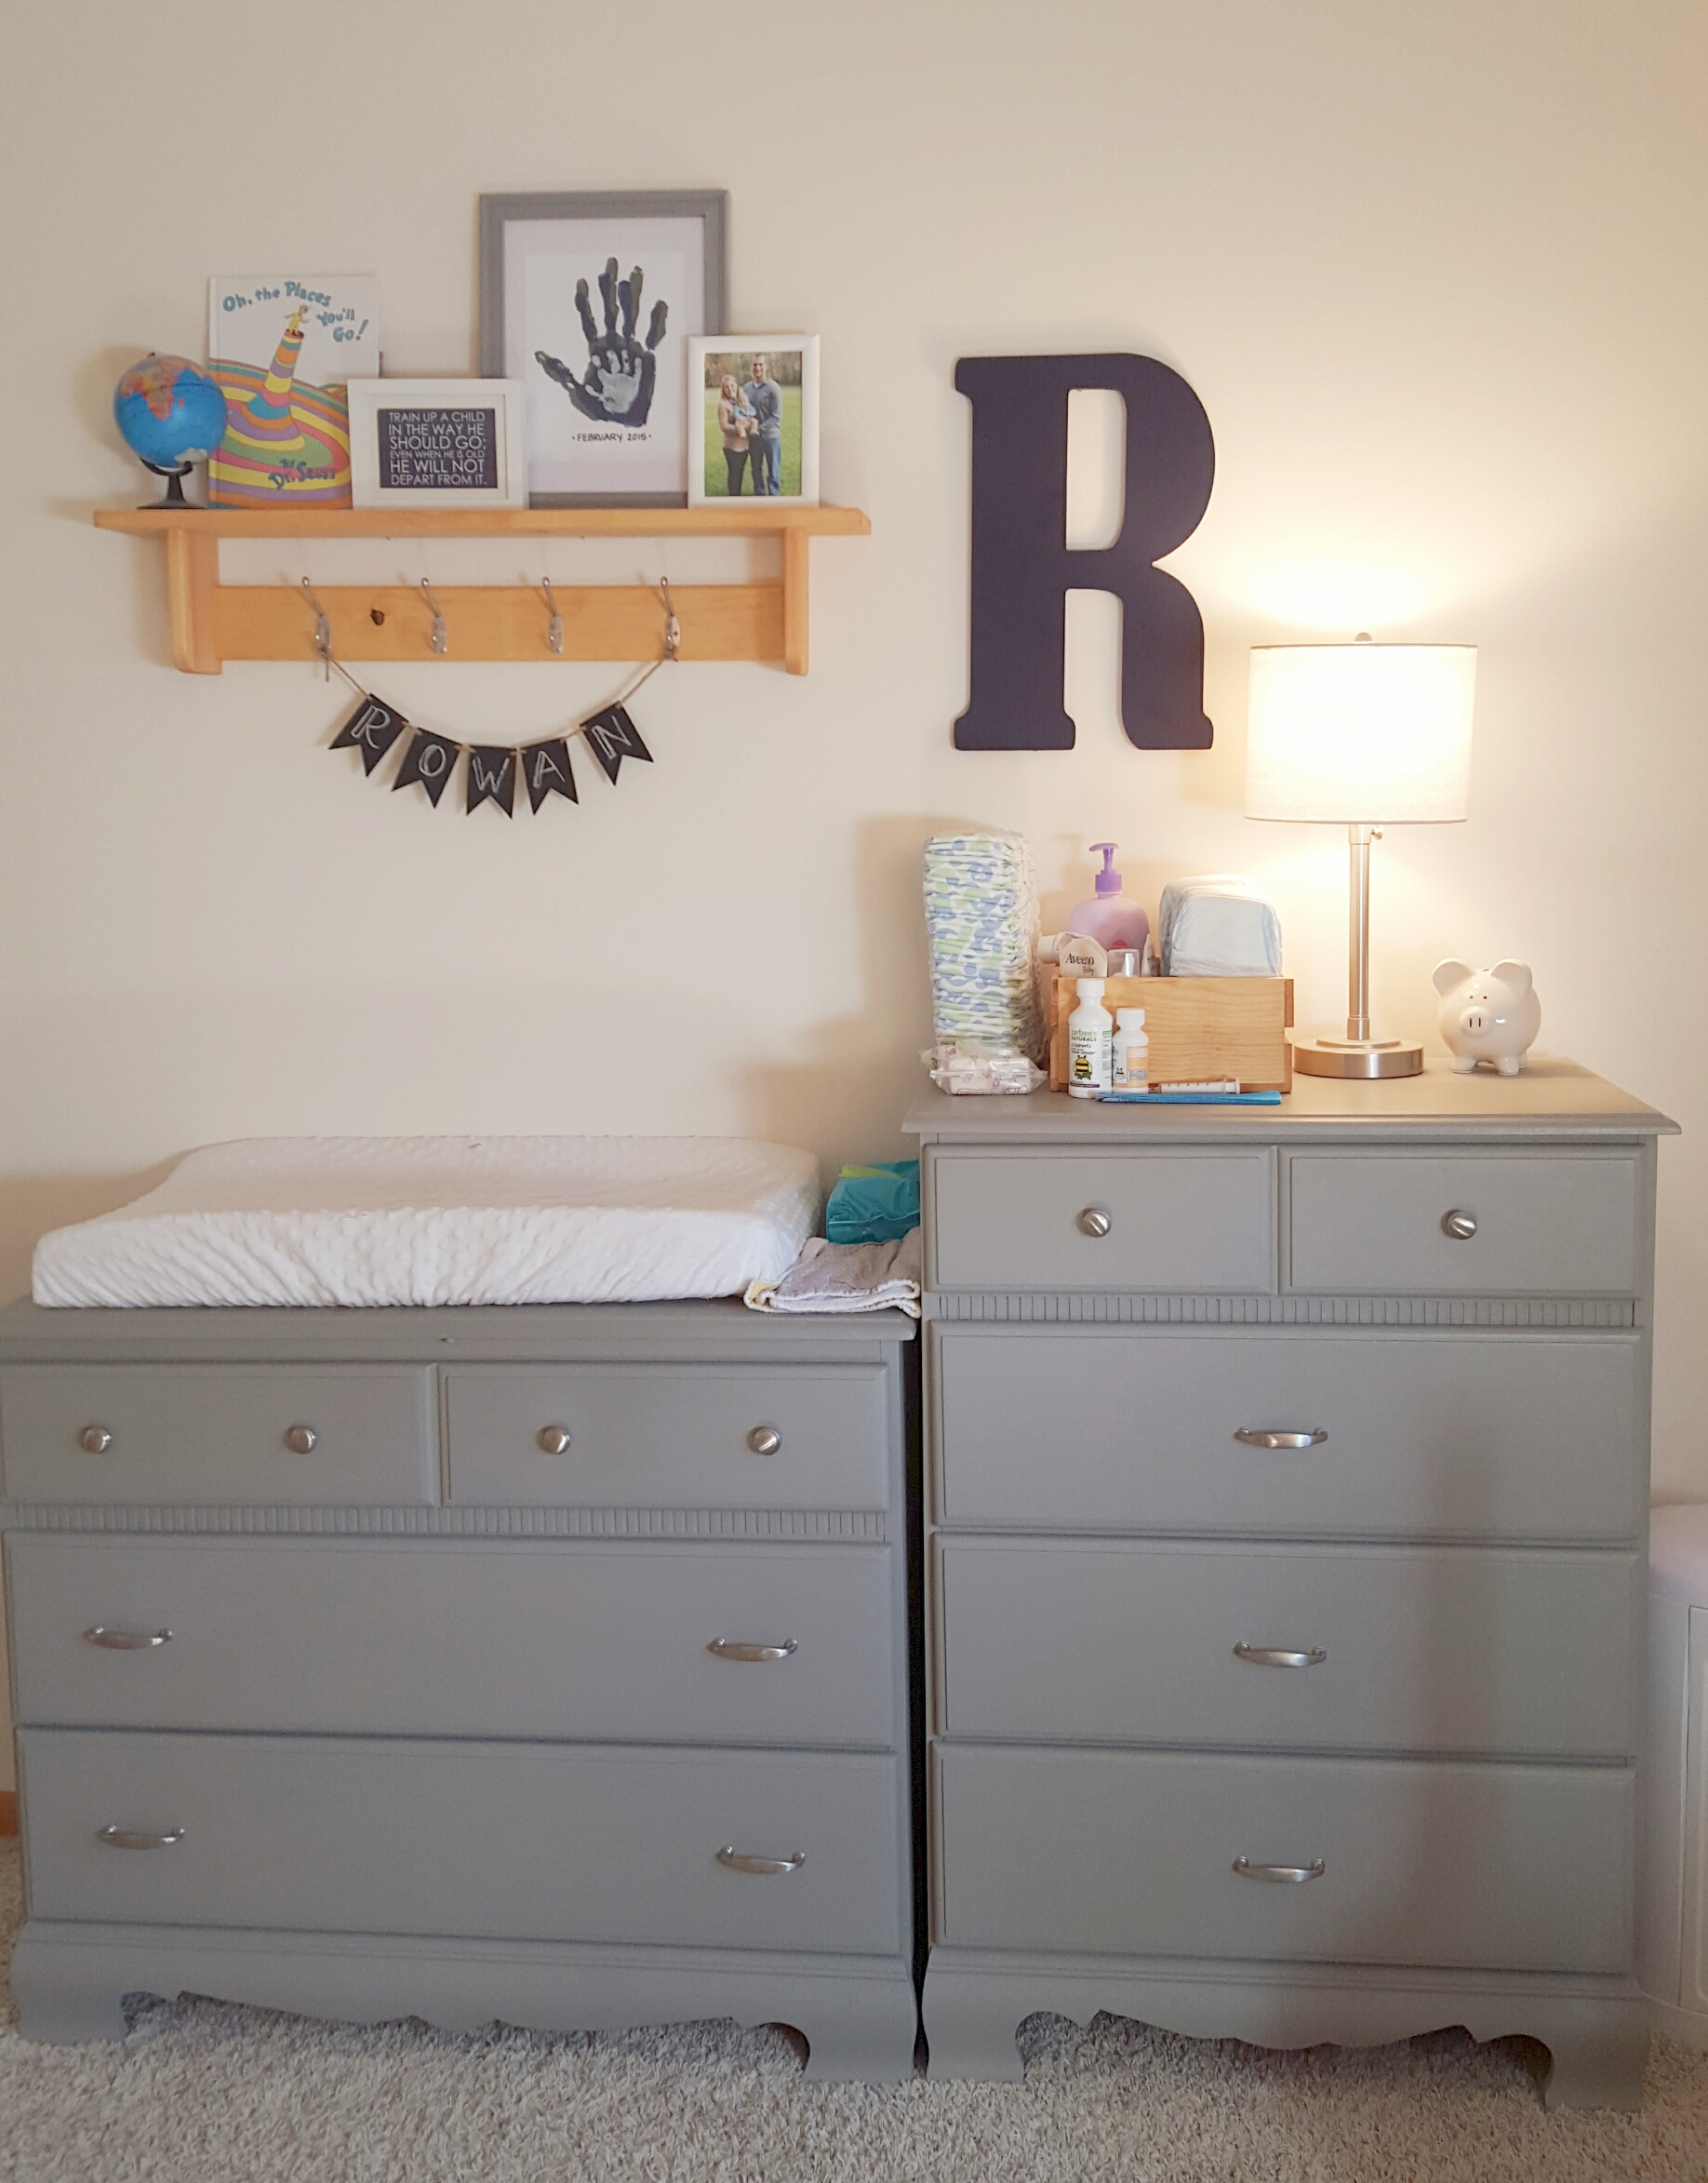
I use my Annie Sloan French Linen chalk paint and did one coat. This paint is AMAZING. It doesn’t matter what the surface is like that you are painting. You don’t have to sand or prime first, you just go for it. It’s a little pricey but one can has lasted me 4 large pieces of furniture with still more to spare. After you paint, you seal it with an Annie Sloan wax coat. I use her clear wax but there’s also has a dark wax for a more antiqued look. The wax makes your piece waterproof and pretty scratch proof. I learned my lesson on waxing from my previous pieces that I did. You DO NOT need a lot. A little wax goes a very long way. Rowan’s dressers in his nursery were my first pieces I use the paint on and I swear 2 years later, they still feel waxy. They’re beautiful and work great in there but my waxing definitely got out of hand lol. I’m not sure if I did the steps correctly this time, but I actually sanded and got the shabby chic, rustic look I wanted, after painting and before waxing. I think you are technically supposed to wax before sanding, but it all worked out ok! The piece turned out awesome. I could not be happier with it! And it is perfect size wise to display my yard sale window pane that “I didn’t know what to do with but desperately needed.” A statement I make regularly. 🙂
Here is the AFTER!!! WOOHOO! Isn’t she a beaut!? (You’ll also notice my large 80’s style wood wall. 🙂

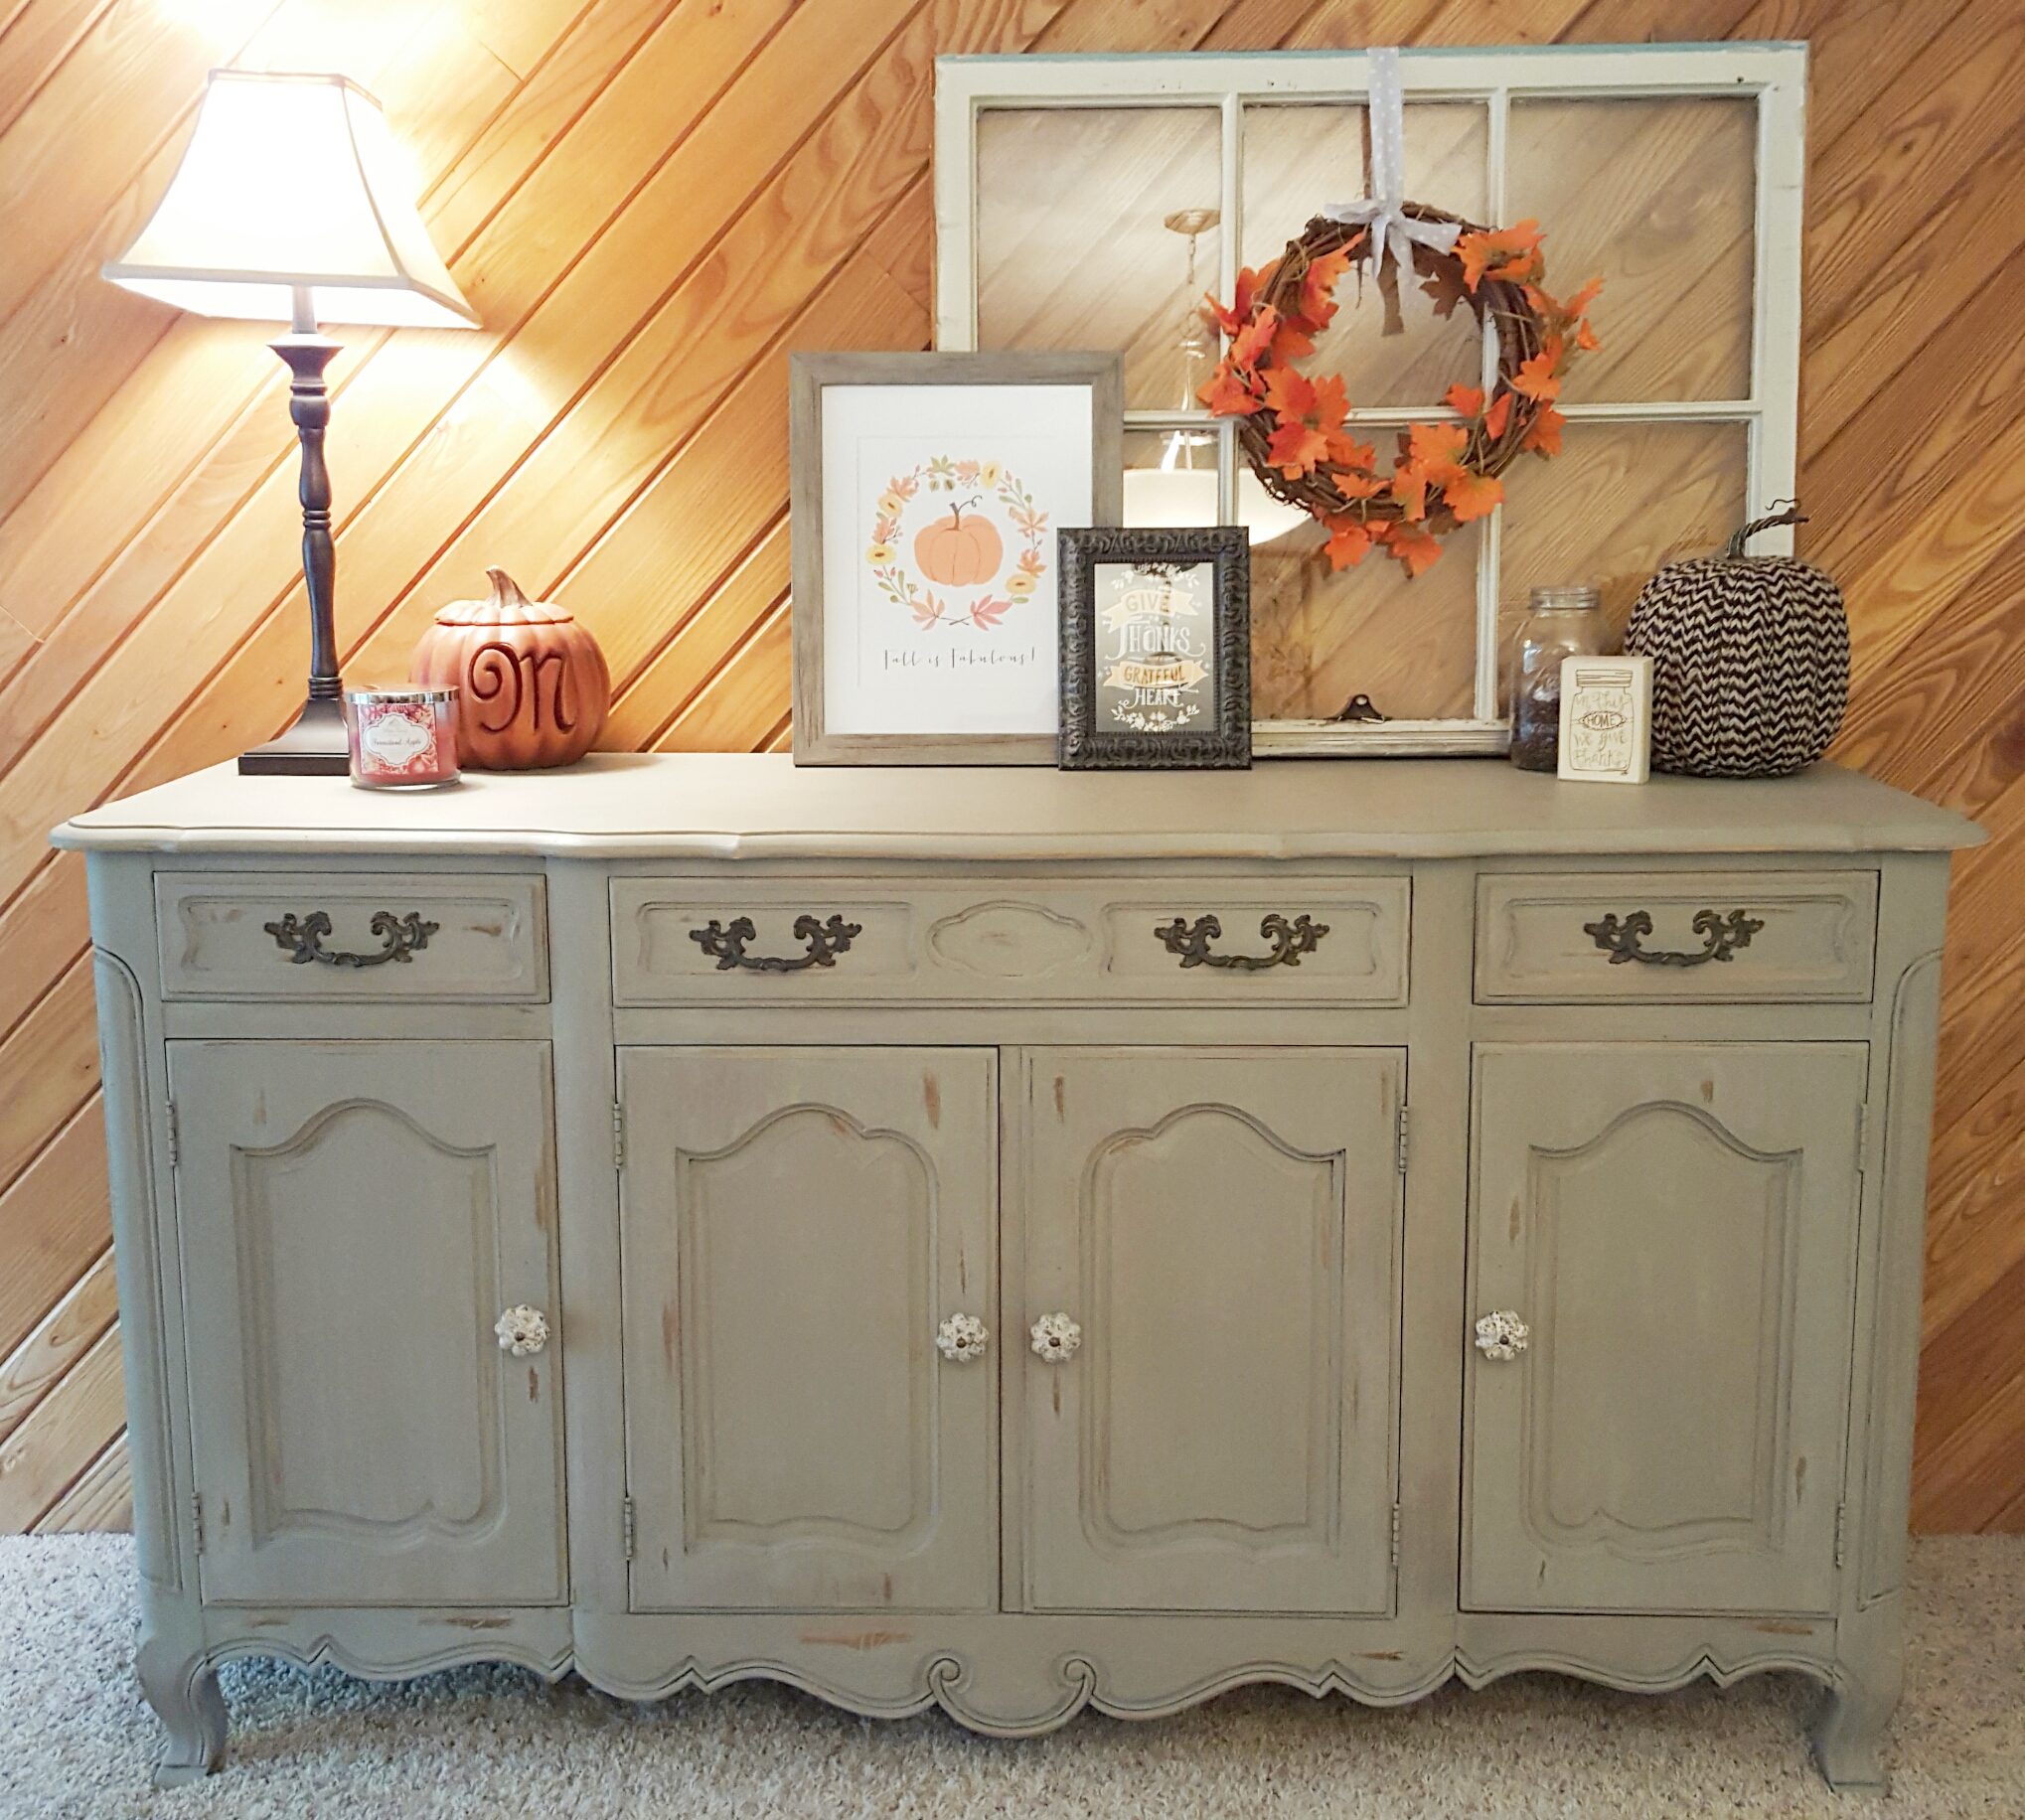
I thought I’d show you a few more pieces I’ve done throughout our house as well. Pretty much everything we own has been free, handed down, or under $10 from a yard sale or antique store. The buffet is the only exception to that but I mean c’mon. It’s SO COOL! And I rationalize it to Josh by saying, now that I redid it, I could probably sell it if necessary and make a major profit on it!
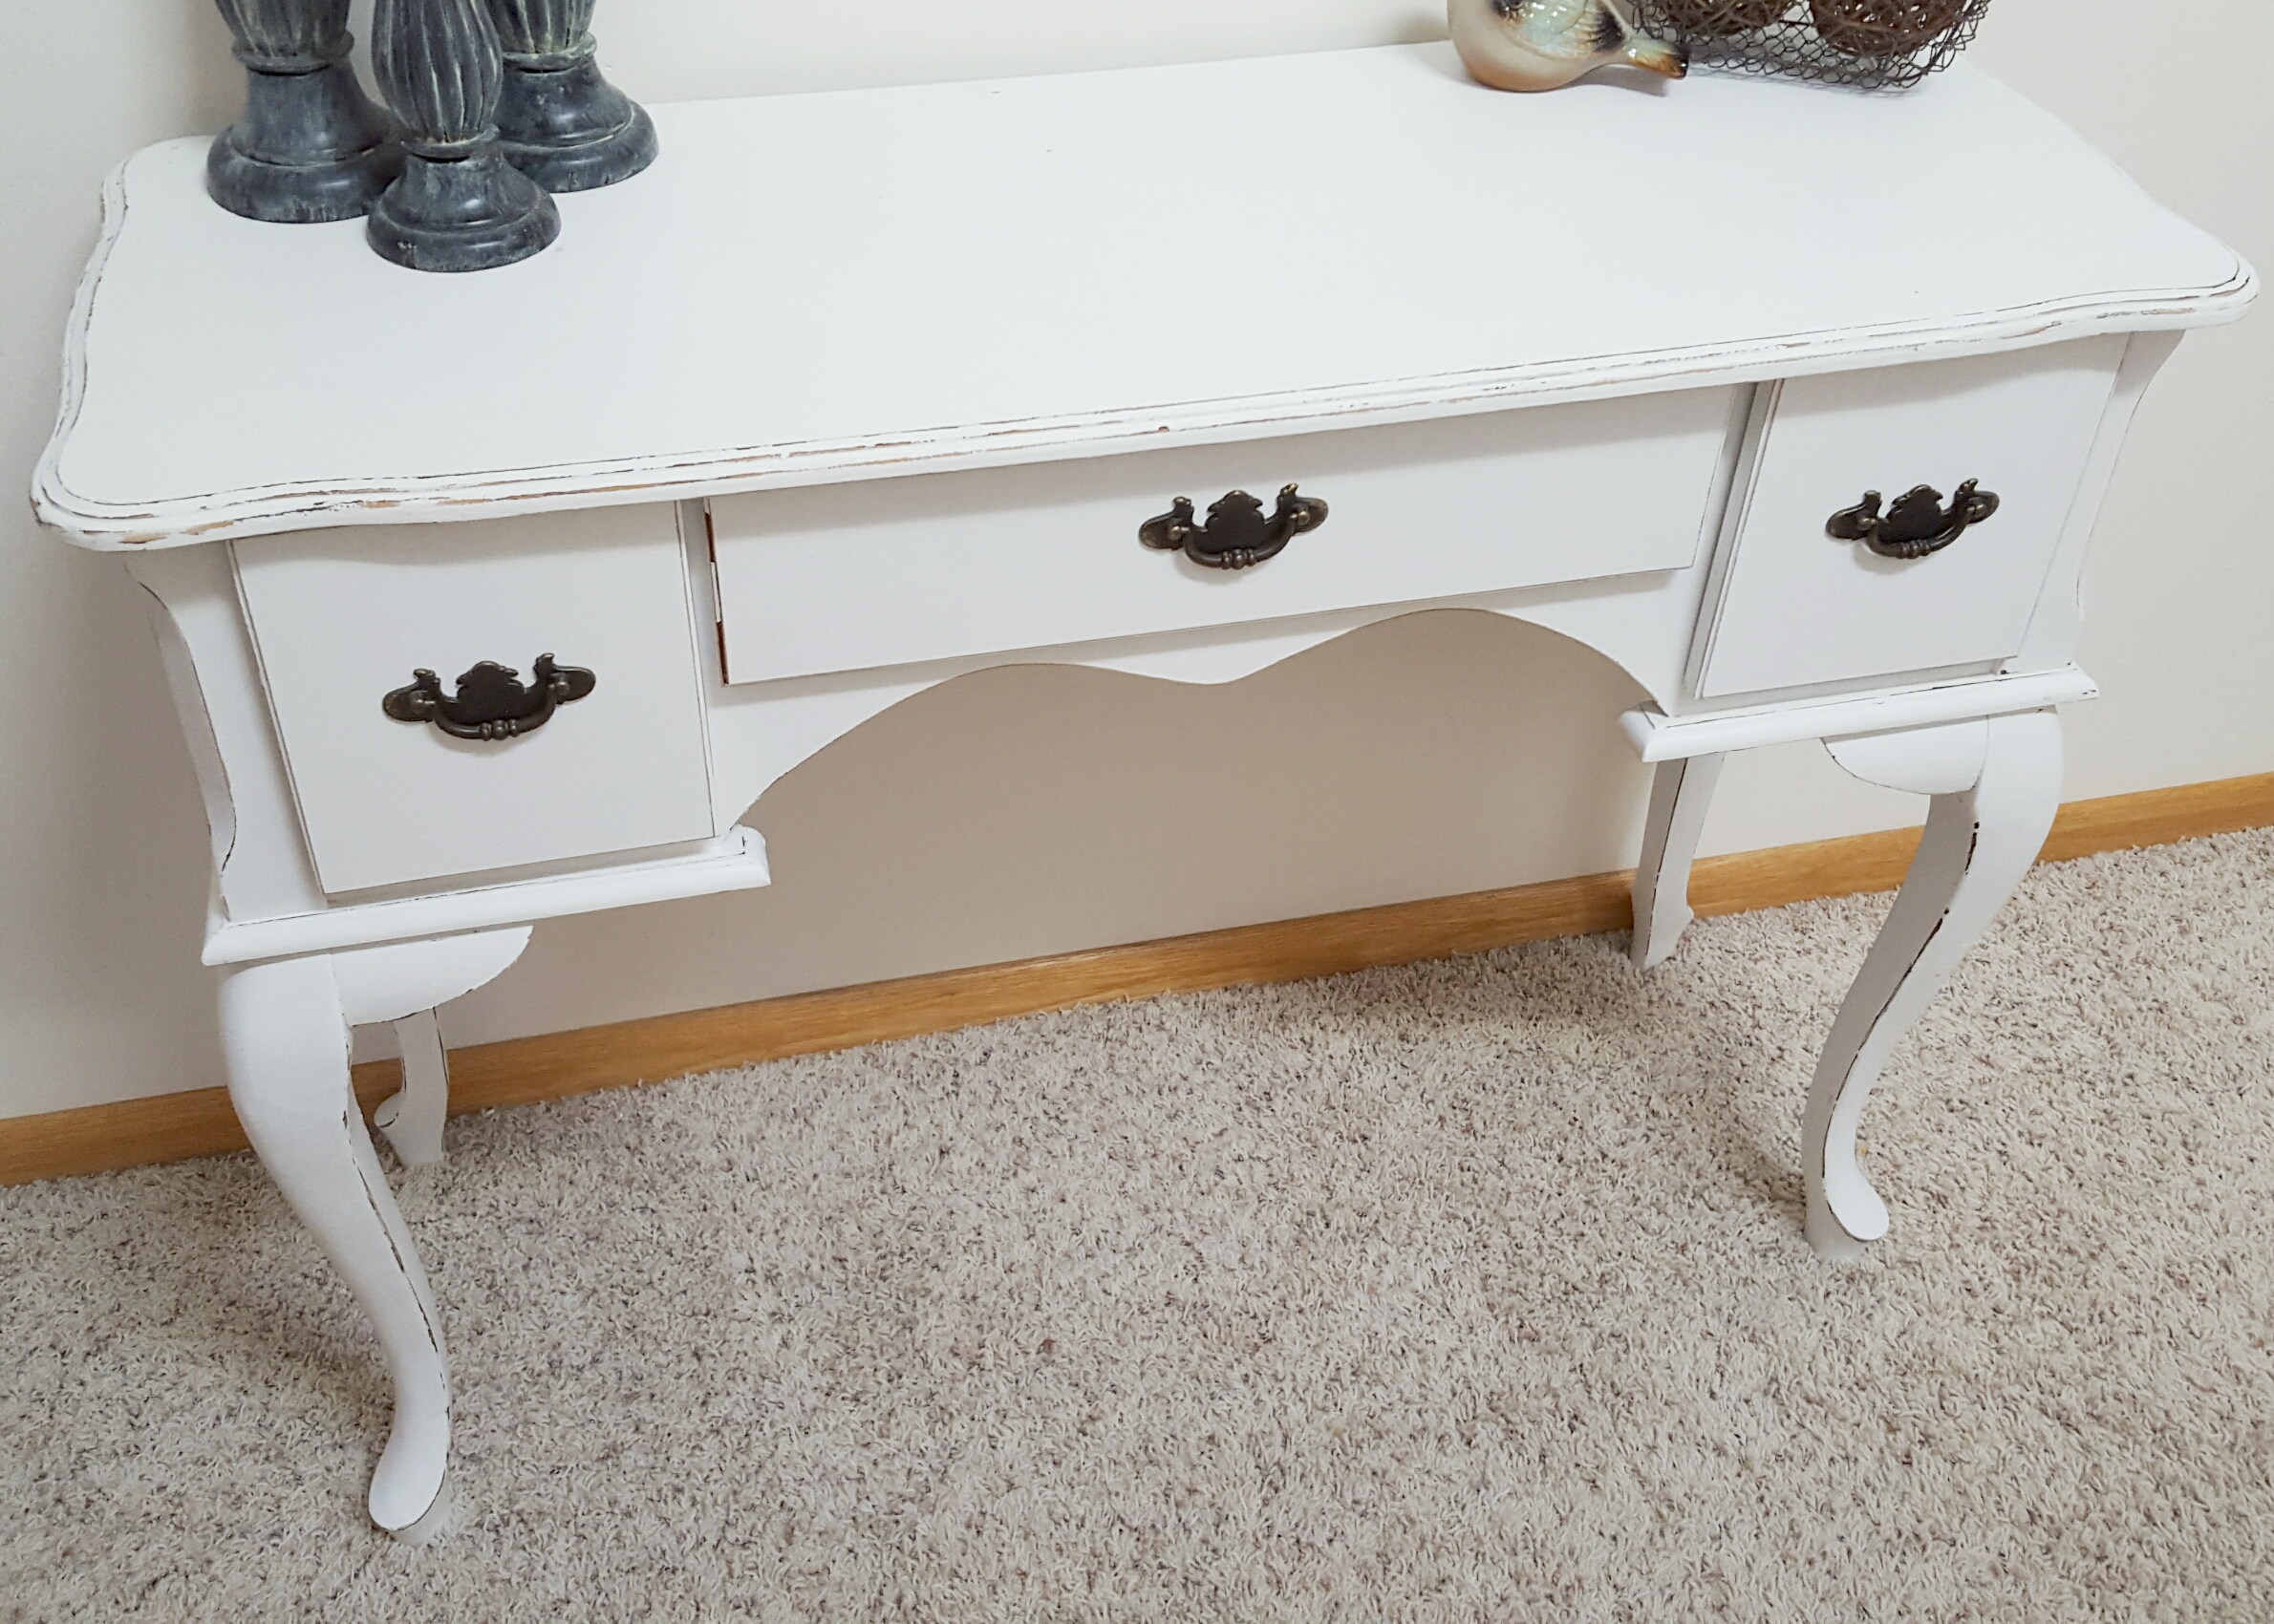
I can’t find before pics of these others but just trust me, they were all ugly haha! This sofa table was from The Ranch consignment furniture shop. It was originally a very dark wood that was SO shiny and yucky! I primed it, painted it white, distressed it, then did a coffee stain over it using reallyyyyy strong black coffee! And I thought I’d show off one of my favorite gallery walls. It’s upstairs so no one really sees it but us, but I love it! Give me ALL. THE. NEUTRALS.

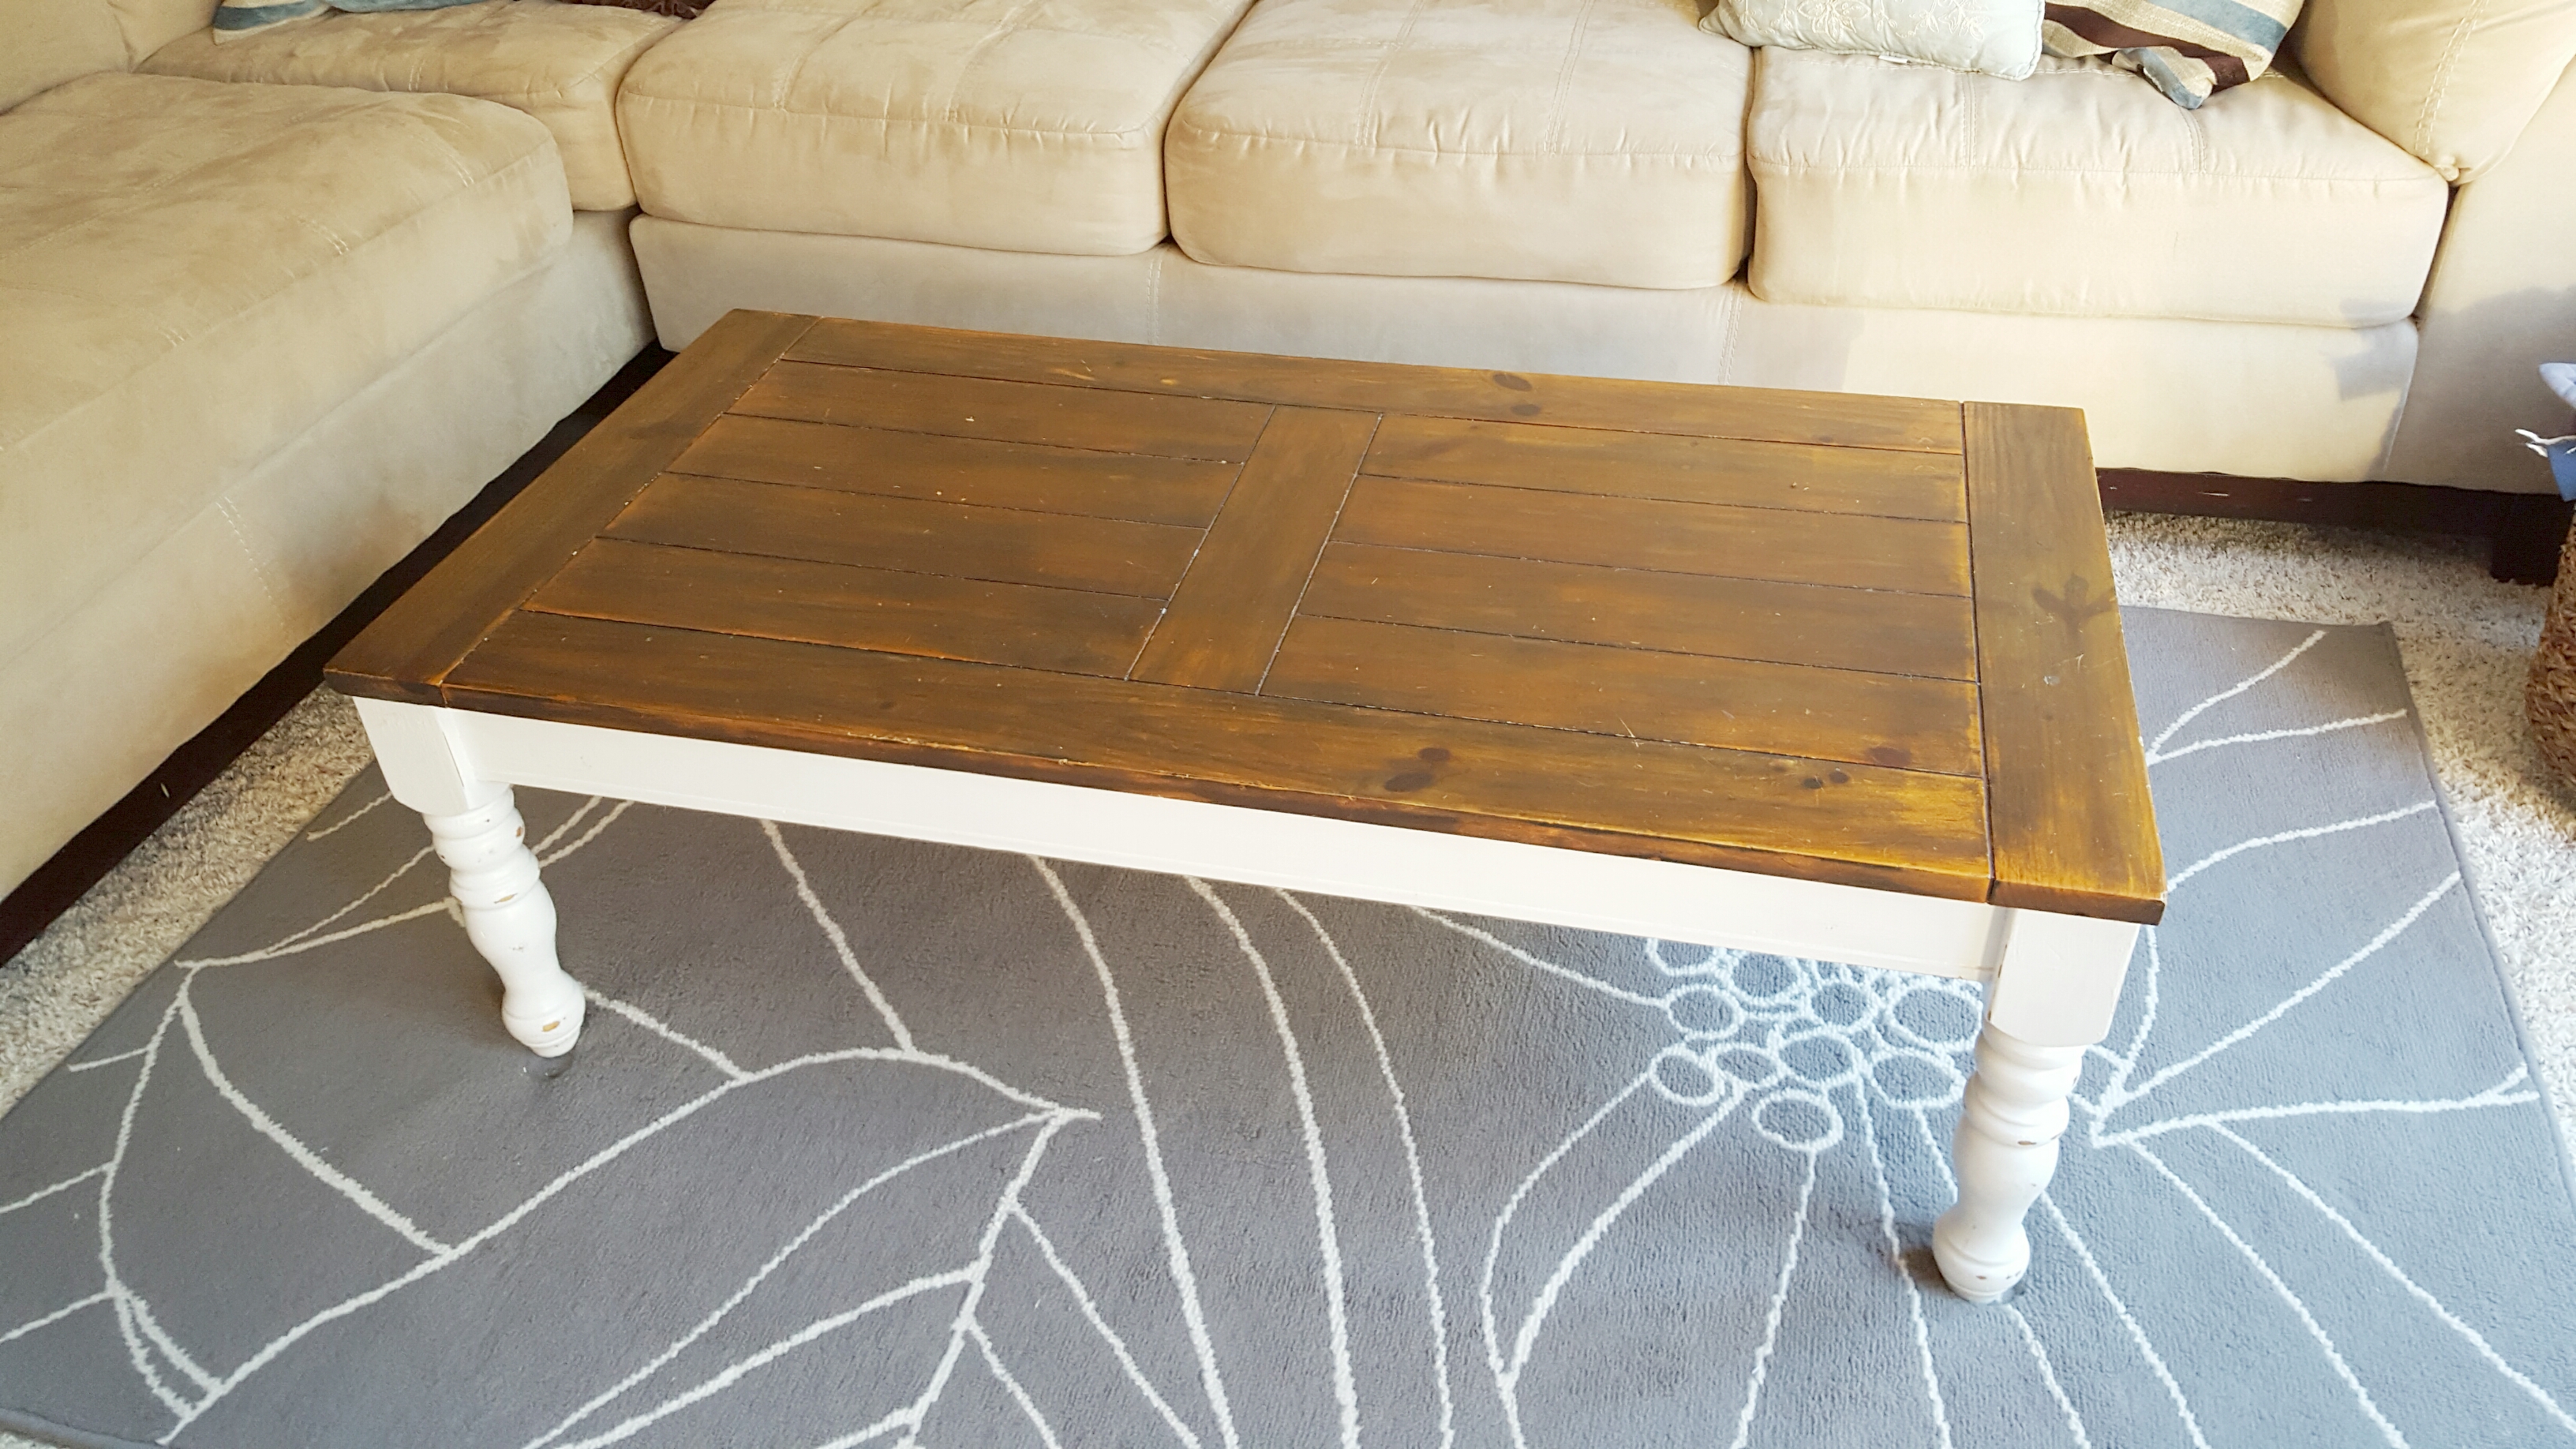
This is our coffee table after. The before was an orangey looking, shiny, pine table. This thing is now very distressed and worn and I wanted it that way because I wanted it to be able to weather a lot of wear and tear. I sanded down the top and did a stain wash on top with ebony stain. Then I painted the bottom white. It used to be decorated all pretty with books and jars. But then came along a 15 month old tornado and I said bye-bye to all the nice things I had at his level haha!

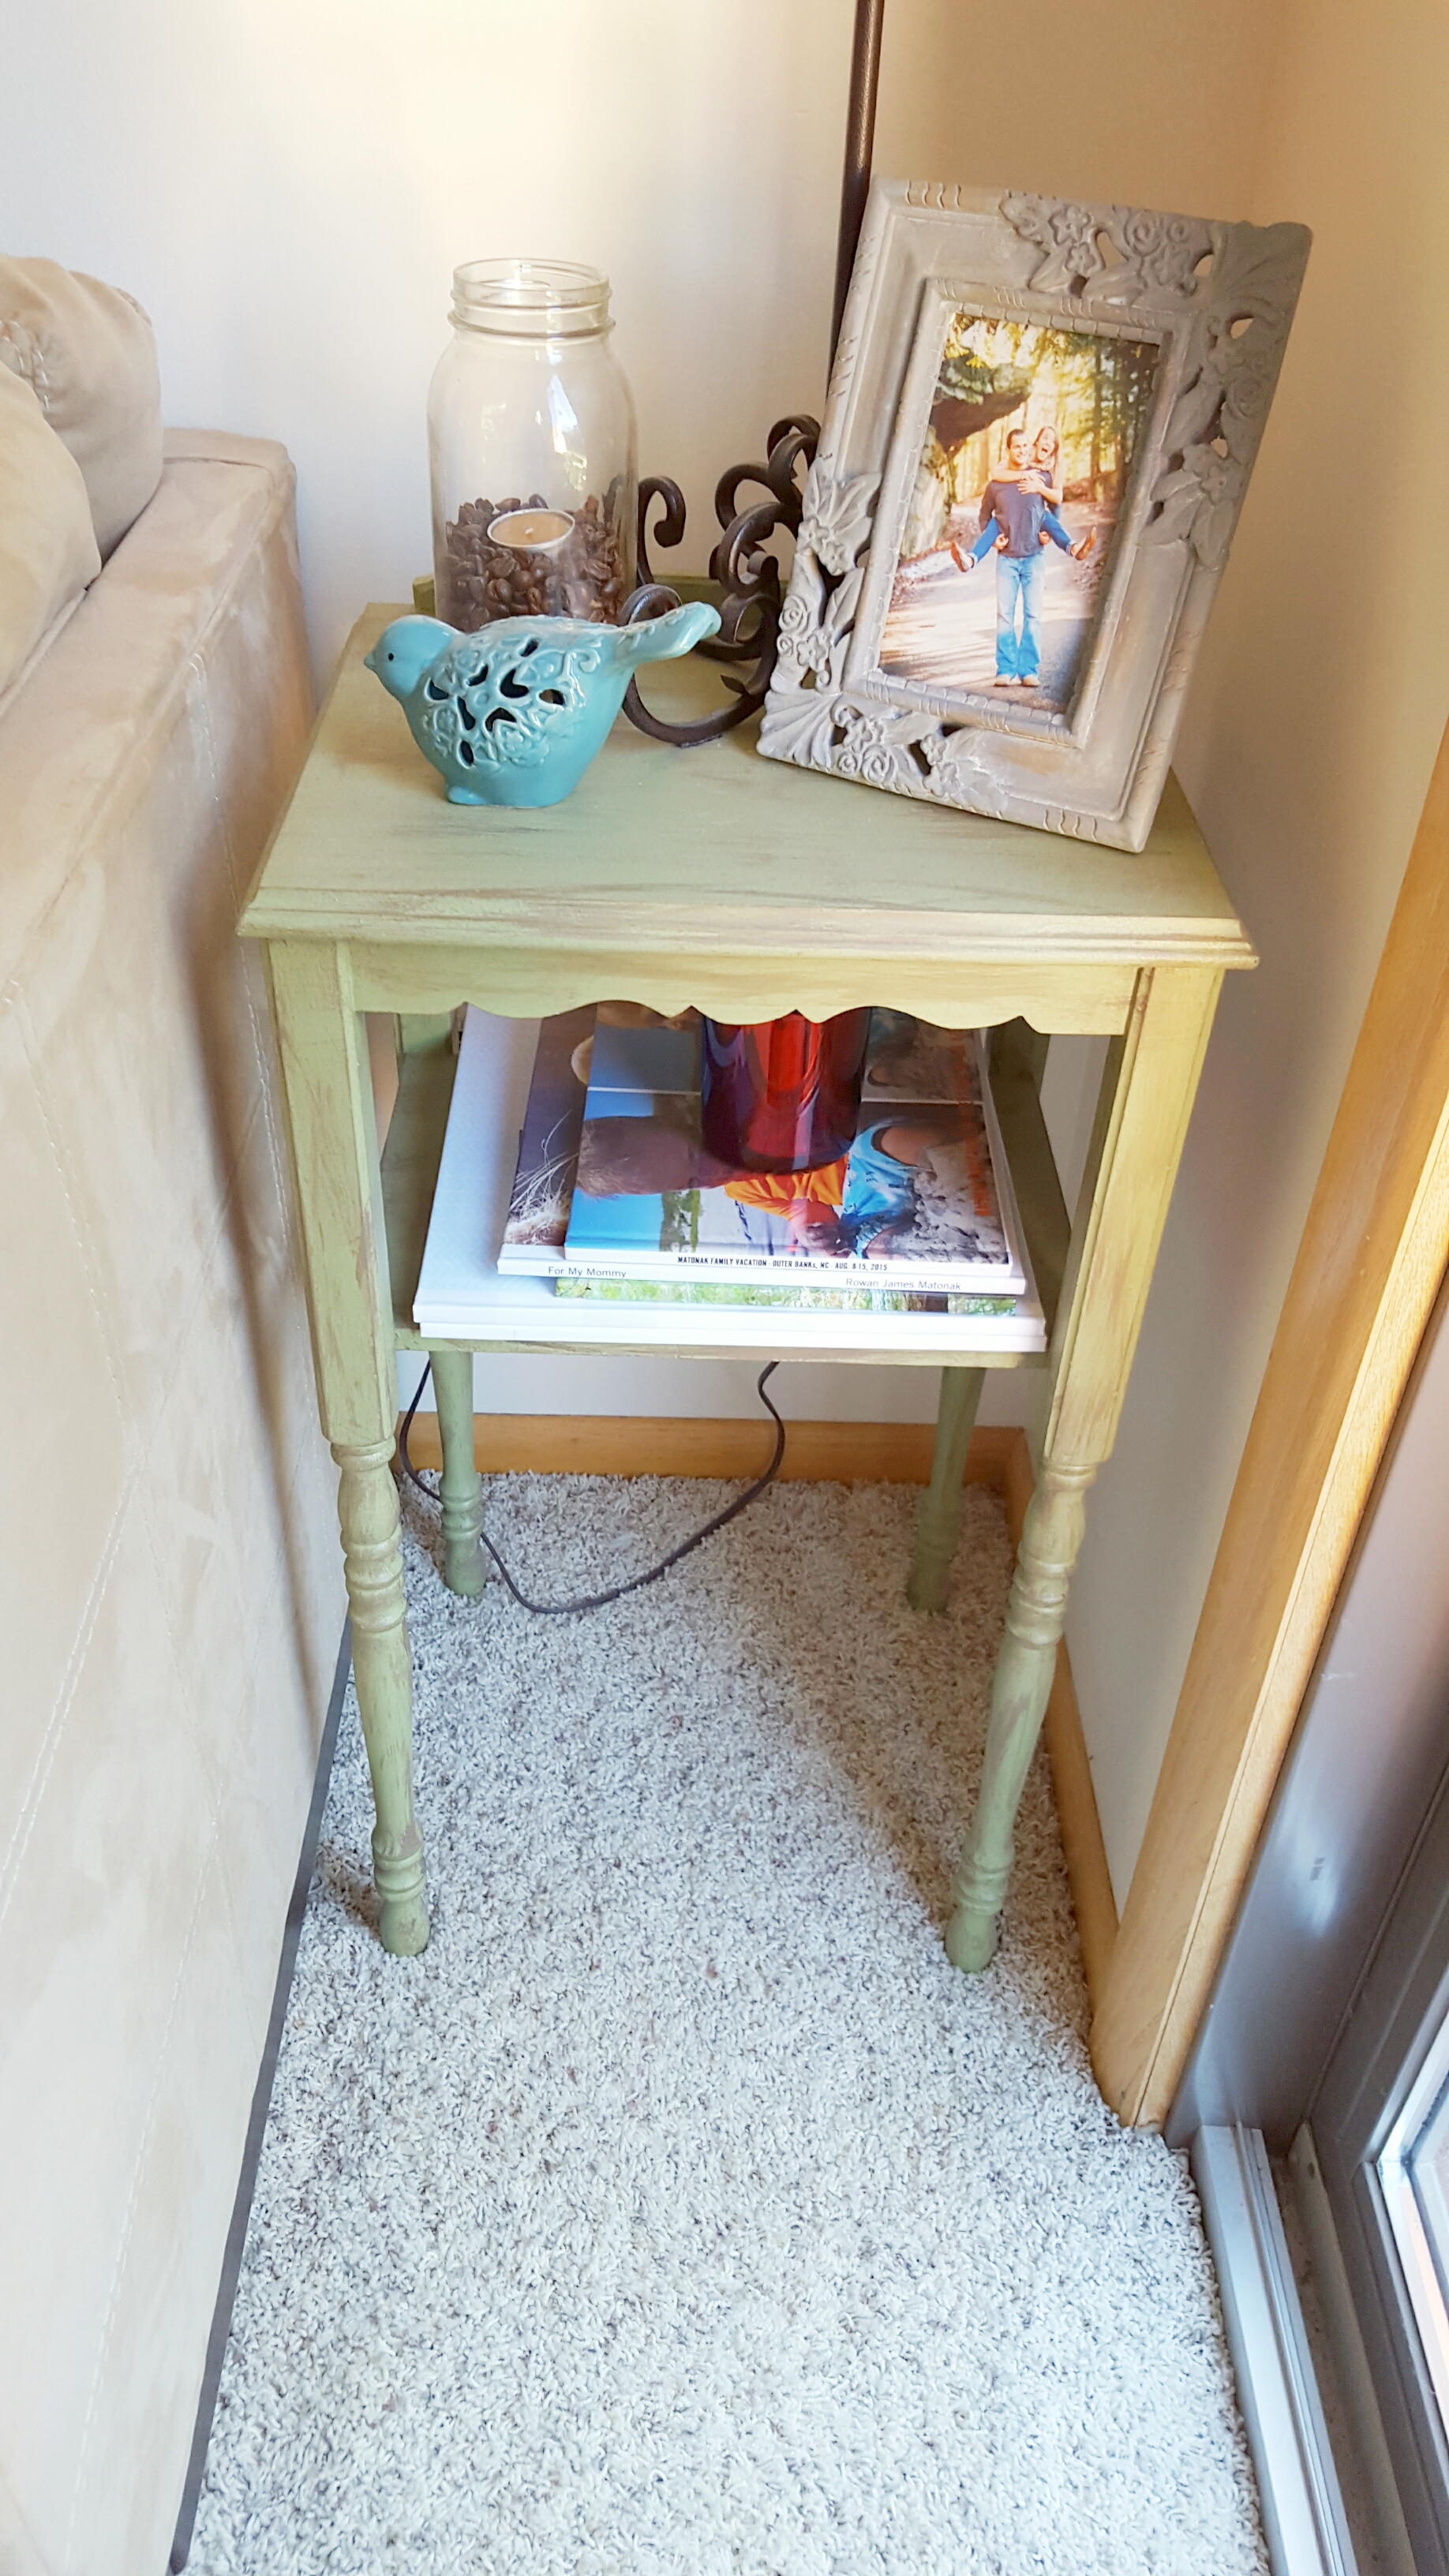
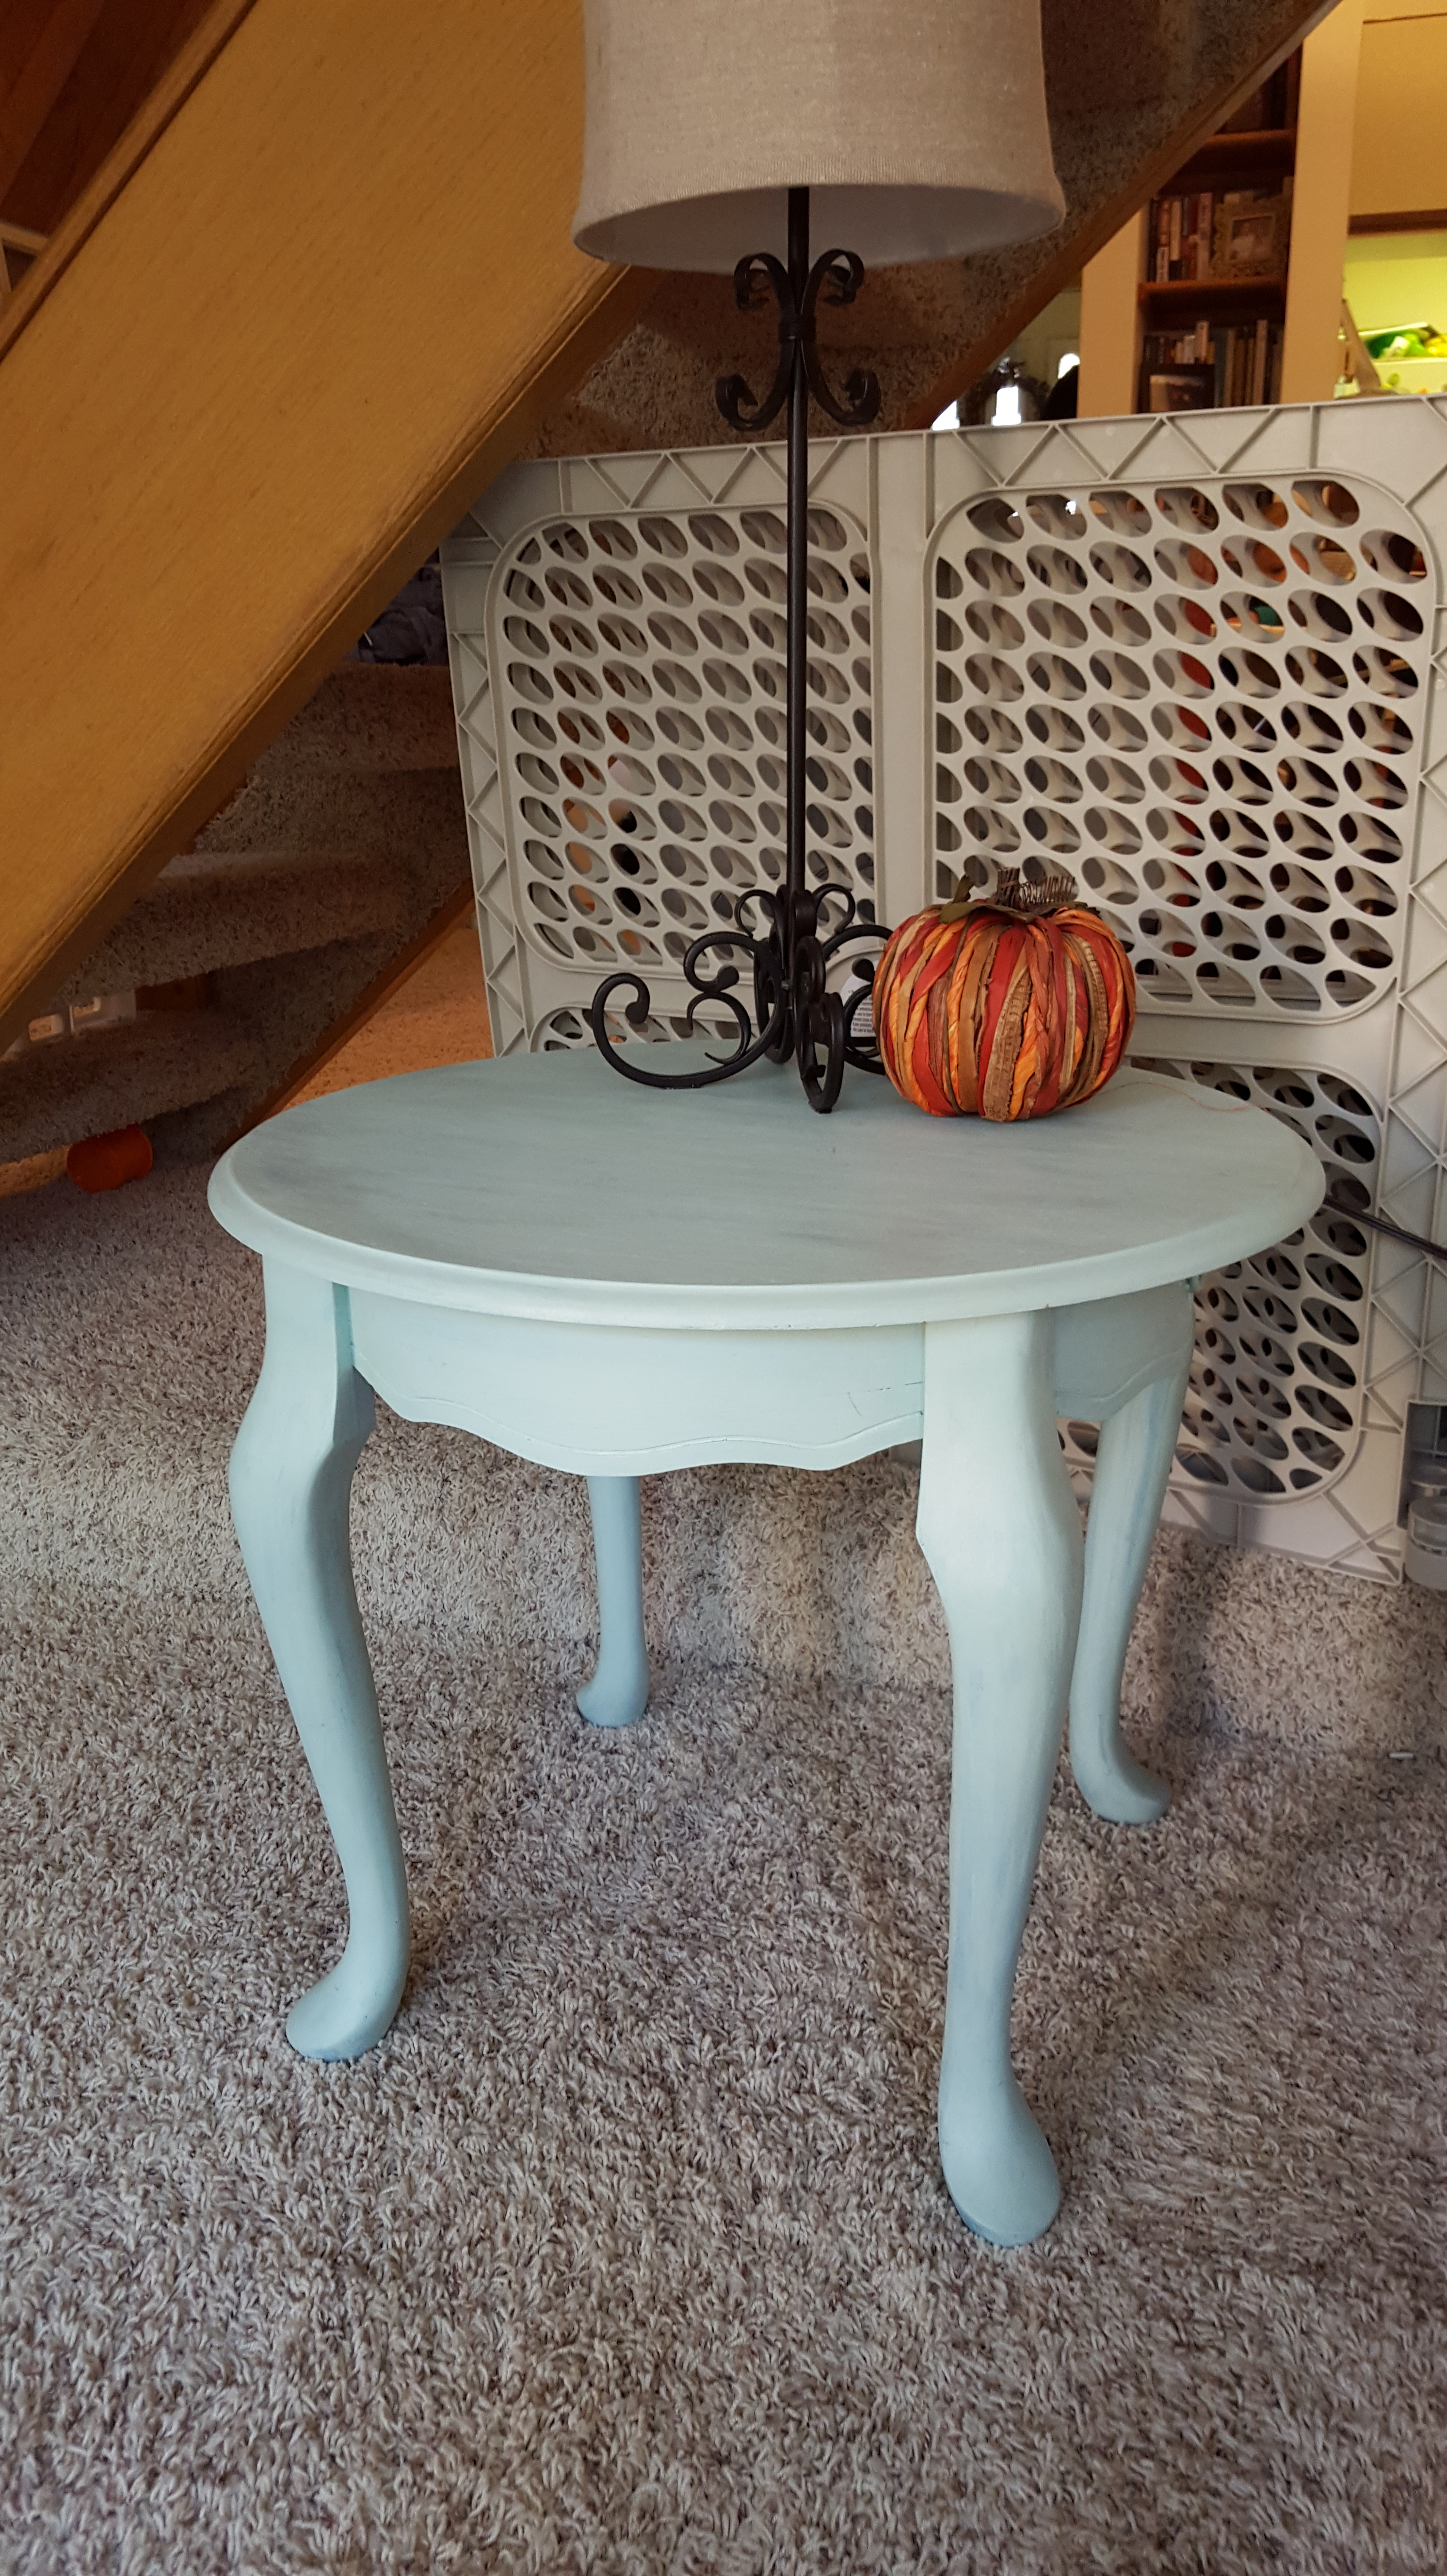
The next to are our end tables that I have in the living room. The first one is from an antique shop that was $3 I think. I was mustard yellow and I just painted it with some green paint that I had and then dry brushed it with a brown/ taupe color! The second one is a table that Josh brought into the relationship. It was a dark brown, shiny wood that was pretty dinged up. I sanded in down, painted it with an aqua color and then dry brushed it with a mint color. Pretty much all of my paint comes from clearance samples at Lowes. You can get little tiny tubs for like $3 and that is plentyyyy of paint for these little pieces.
This is our dresser in our bedroom that was given to us for free. All I did here was prime it, throw on some khaki sample paint and some new knobs! It was probably under $10 for this project! And just excuse the overflowing jewelry box on the corner. I don’t organize EVERYTHING in my life haha I had to close half of those drawers just to take the picture!

These are Rowan’s dressers that started out as mine many, many years ago! They were actually a family friend’s before that and then after I was done with them, my mom used them for awhile. Now here they are, with new life, in the nursery! They were that cheap looking, shiny wood before. These were my first project with Annie Sloan paint and they are the ones I mentioned are a little waxey but overall I love how they turned out! I added new knobs and pulls to too and waha-la! Like new!
Anddd I’m just going to throw a gallery wall in there for kicks! This is the new one I did this summer over our couch in the living room. I have collected so many frames over the years, either free, clearance, or handed down. If I’m working on a gallery or something else and the frame I have just doesn’t match or fit, I just sand or paint it to make it look the way I want. Most of the frames in my house have been redone 2 or 3 times and I bet it’s safe to say that very few of them are their original color. This saves lots of money and for the amount of times I like to change my decor, it’s the only way to go. In a few months when I decide I want the walls to look different, I just move things around, paint, sand, etc, and BOOM, it’s like new!

I hope you enjoyed this little refurbishing tour. Please share in my excitement over the buffet because Josh just does not have the same appreciation for these things as I do! haha MEN!!! Sheesh! Although the other day he did randomly say, “Wow that actually looks really good.” So I’ll consider it a success!
Thanks for stopping by!
